Farmhouse Sampler - Block 4 (Goose Tracks)

Three blocks done and 6 more to go. Let's tackle 1 more of them today with our next block, Goose Tracks.
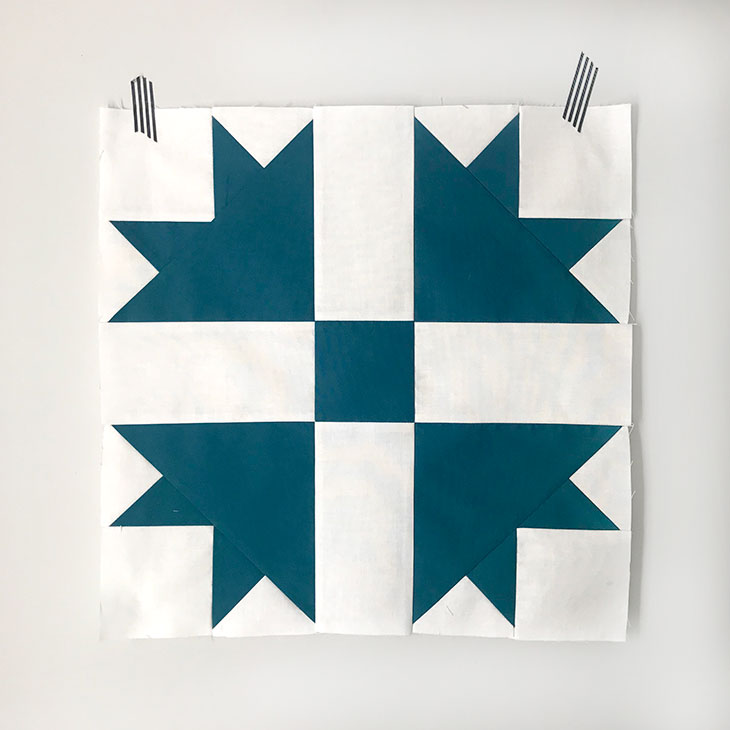
Now this is one of those blocks that goes by a few names, like Cross & Crown or Tulip Wreath. I'm going with Goose Tracks because that's what the block looks like to me -- and it fits in perfectly with the farmhouse quilt theme.
There are a decent number of seams on this block so please take your time getting your cuts and seams accurate. Also, be sure to add #farmhousesamplerquilt to your shared images over on Instagram. Adding that hashtag to your progress or finished blocks is such an easy way to connect with other quilters on Instagram -- and we'd love to get a chance to connect with you!
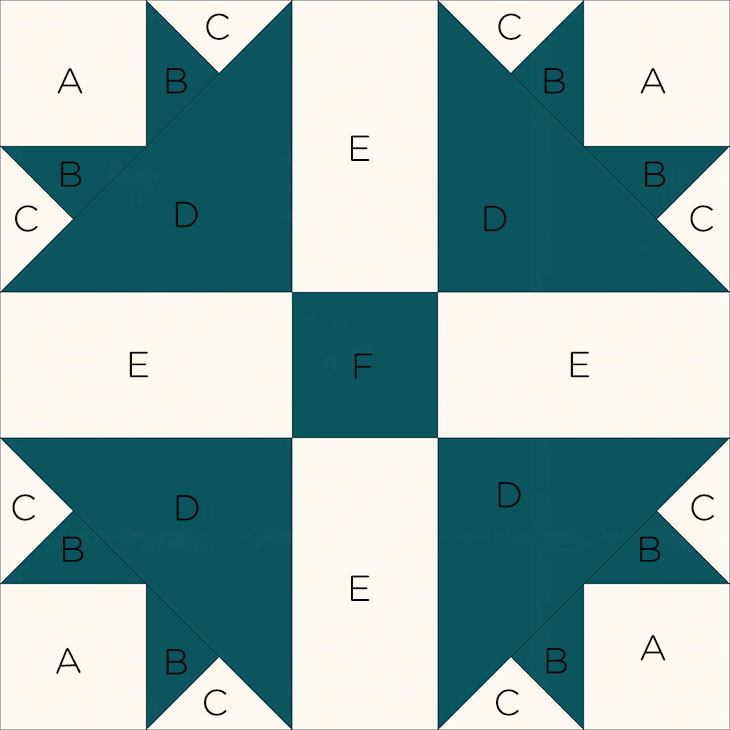
CUT:
- four (4) 3-1/2" squares from A
- two (2) 4-1/4" squares from B
- two (2) 4-1/4" squares from C
- two (2) 6-7/8" squares, cut in half on the diagonal (yields 4 triangles) from D
- four (4) 3-1/2" x 6-1/2" rectangle from E
- one (1) 3-1/2" square from F
PRESS. With a hot iron, press your blocks to remove wrinkles and creases.
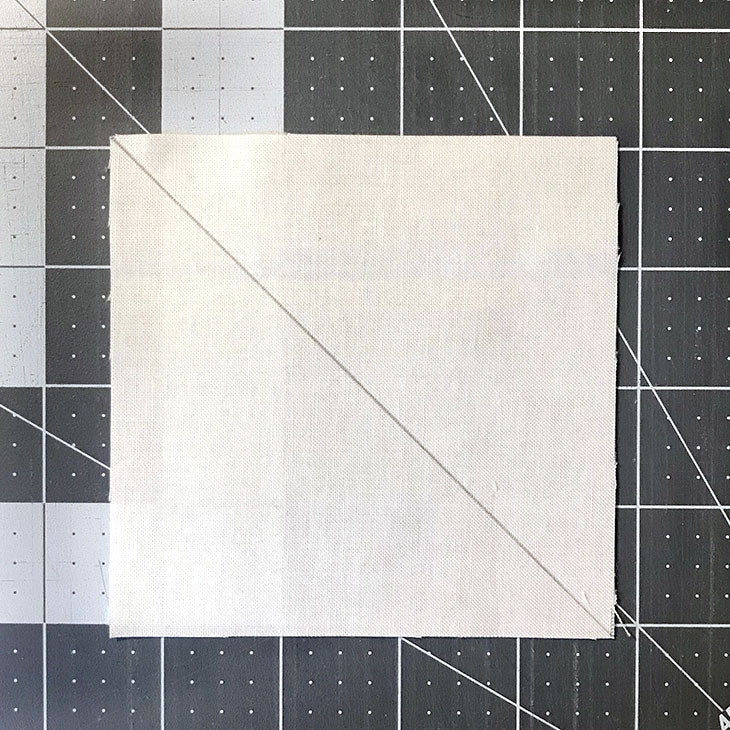
MARK. On the wrong sides of your 2 "C" blocks, draw a diagonal line with a pencil.
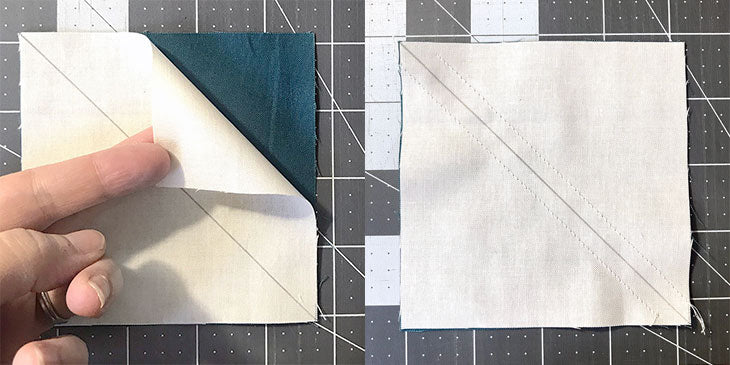
PLACE RST and SEW. Place your 2 "C" blocks RST with your 2 "B" blocks and sew 1/4" seam along both sides of the drawn diagonal line.
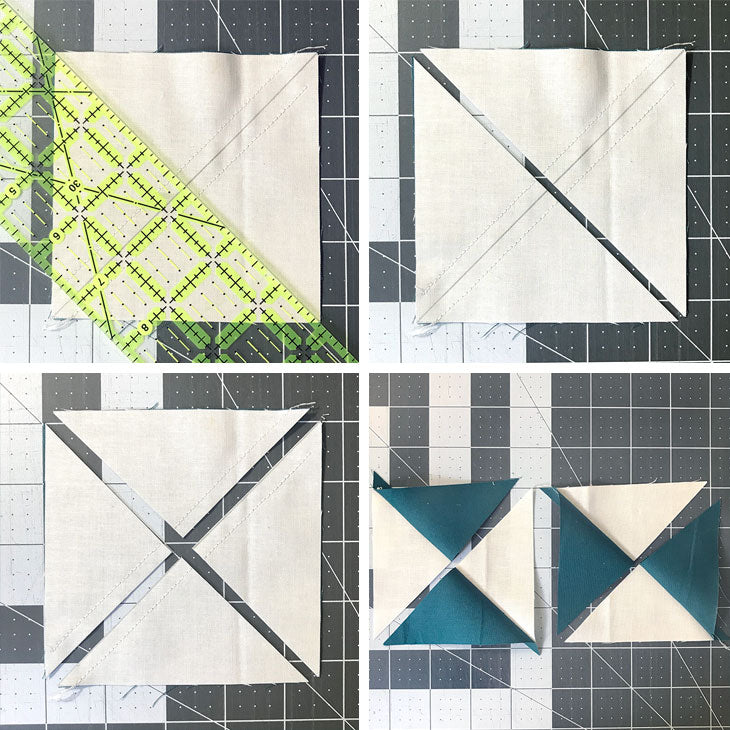
CUT. Line up your ruler along the diagonal through the opposite corners from which you sewed. Use your rotary cutter to cut the blocks in half diagonally. Once cut, line your ruler up again along the drawn diagonal line and cut with your rotary cutter. Repeat for both blocks and you'll end up with 8 side-by-side triangle blocks, as shown above (bottom right).
PRESS. With a hot iron, press your seams to the dark side. Trim dog ears.
LAYOUT. Using the block diagram as your guide, lay out your block. This will make piecing easier as we work through the next few steps.
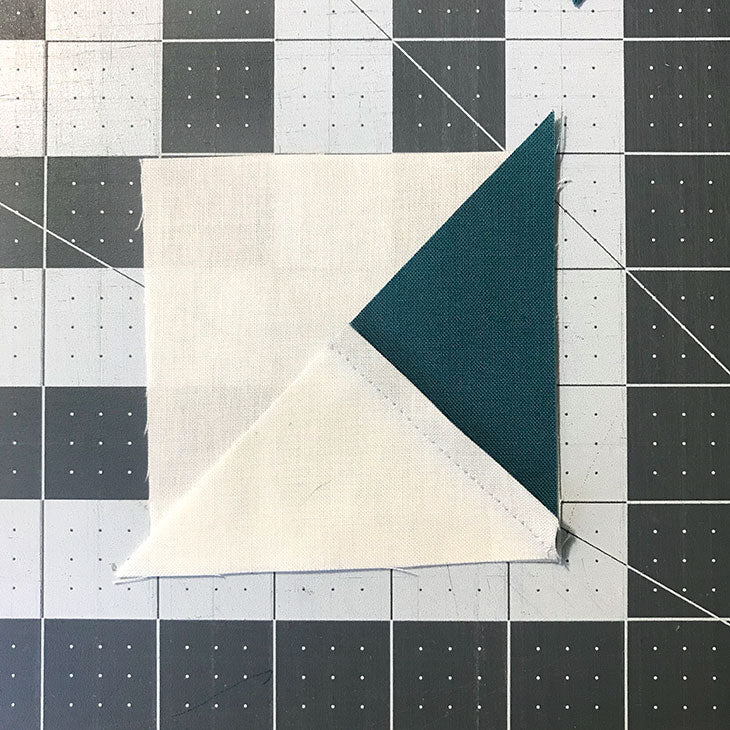
PLACE RST and SEW. Place your “A” block RST with a B/C side-by-side triangle blocks. Line them up along the edges and corner; the tips along the long side will overhang. Sew with 1/4” seam allowance. Press seam to the side. Trim dog ear.
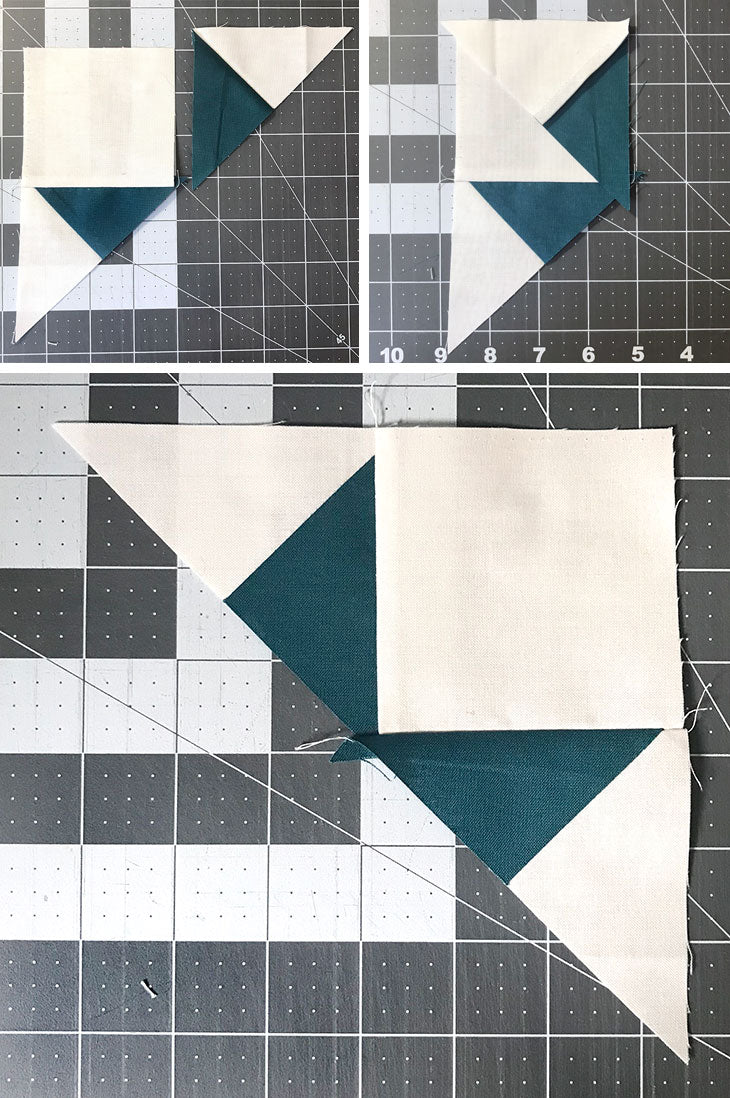
PLACE RST and SEW. Place the other B/C block RST with your “A” block as shown above in the top 2 pictures. Sew 1/4” seam allowance. Press seam to the side. Trim dog ear.
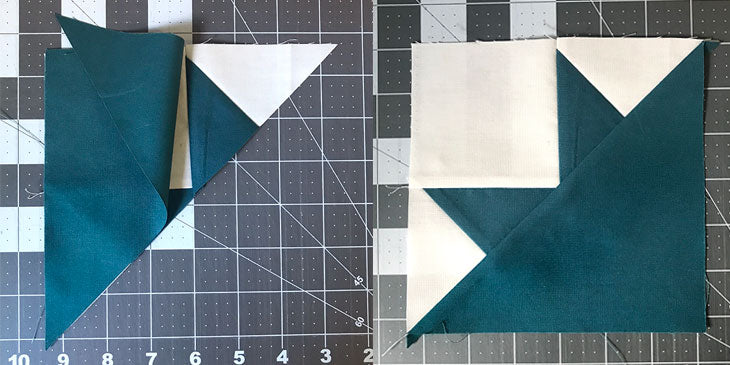
PLACE RST and SEW. Place the top half of the block RST with your “D” block. Sew with a 1/4” seam allowance. Press to the dark side. Trim dog ears.
REPEAT. Repeat steps 7-9 to piece all 4 of the corner blocks (or the tracks, if you will).
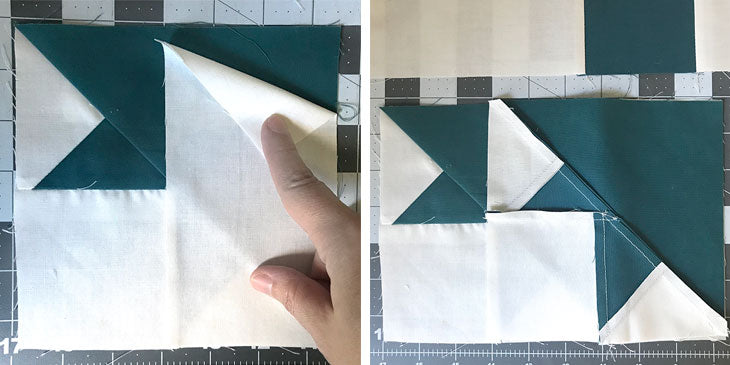
LAY OUT and PIECE. Using the block diagram, lay out the block. With RST, piece a corner (track) block to an “E” block, and then piece another corner block to the first 2. You now have the first row. With a hot iron, press the seams in toward the middle. Repeat these steps for all 3 rows of your block, alternating which way you press your seams. (Row 2 will be pressed out.)
LAY OUT and PIECE. Layout your block again and then piece your rows together RST. (Row 1 to row 2, and then 1 & 2 to row 3.
PRESS SEAMS. With a hot iron, press seams — and this block is done! It will measure approximately 15-1/2" square (or 15" square once finished and set in the quilt top).
As always, if you have questions, leave a comment on this blog post and we'll answer. And then hop over to Instagram and start sharing! ☺️
See you back here in Saturday with our next block tutorial!

Leave a comment